
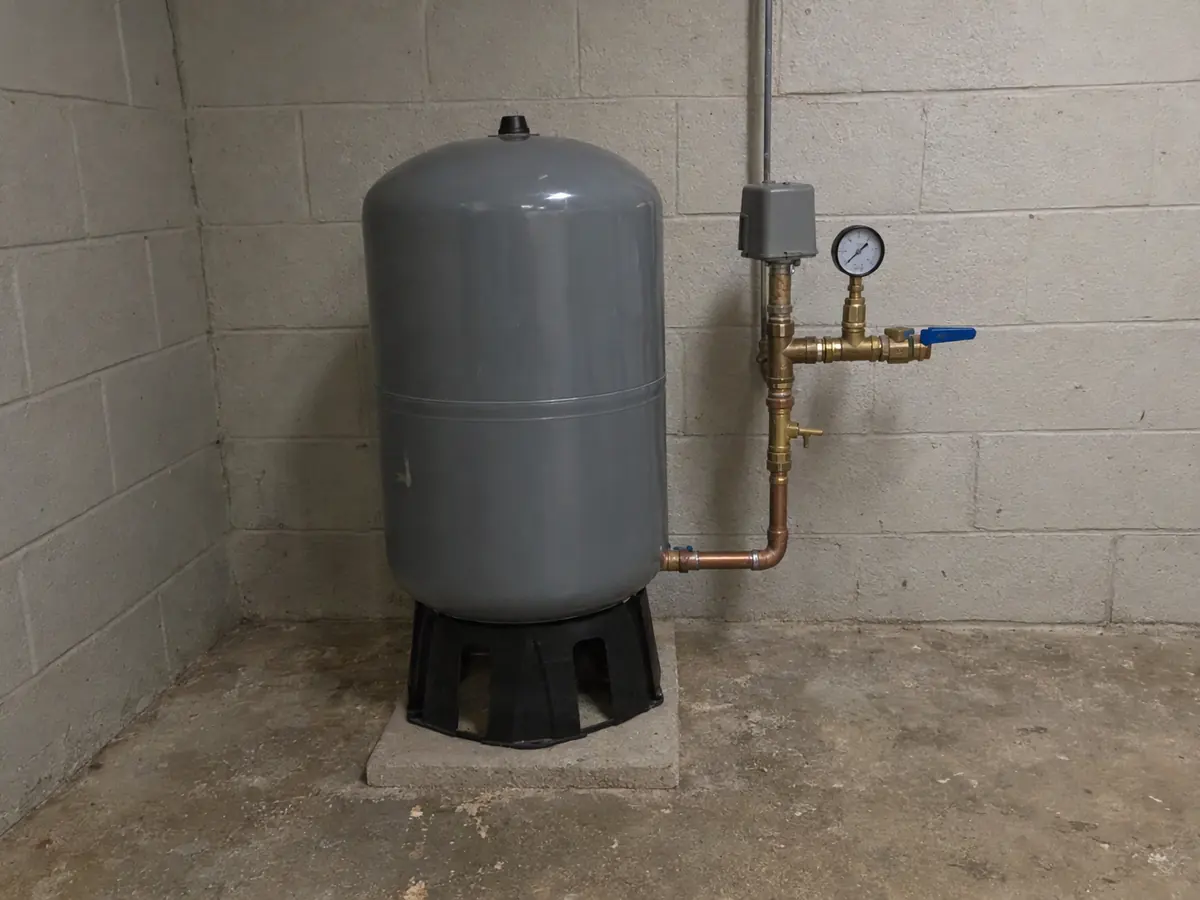
We handle pressure tank replacement, air-charge checks, and full system tuning for well owners from the Triad up into Southside Virginia, in cramped crawlspaces and old well houses alike.
What the tank does between pump starts
Your pump does not run every time someone opens a tap. The pressure tank is the reason. It holds a cushion of compressed air against a supply of water, and that air pushes water out to the house while the pump rests. When pressure falls to the switch's cut-in setting, the pump starts and refills the tank. At cut-out, it shuts off.
On a common 30/50 switch, the pump kicks on at 30 psi and stops at 50 psi. The water the tank hands out between those two numbers is called drawdown. With enough drawdown, a glass of water or a hand wash never wakes the pump.
Fewer starts, steadier pressure, and longer runs when the pump does run: that is the whole job. Lose the air cushion and all three go the wrong way.
Bladder and diaphragm tanks next to the old galvanized kind
Most tanks sold now keep the air and the water apart. In a bladder tank, the water sits inside a heavy rubber bag and the air charge surrounds it. A diaphragm tank uses a flexible sheet fixed across the shell, water below and air above. Either way, the air cannot dissolve into the water, so the charge holds unless something tears.
Plenty of older homes still have a plain galvanized steel tank, often long and gray, sometimes lying on its side in a well house. There is no bladder. Air rides directly on the water and slowly soaks into it, and an air volume control or a small valve on the pipe was supposed to put it back. When that part quit, the tank filled with water and the pump started cycling.
Emptying a galvanized tank restores its air for a while, but the tank rusts from the inside and the problem keeps returning. Swapping it for a bladder or diaphragm tank is usually the better repair.
Signs your tank has lost its air cushion
A tank that has lost its air is called waterlogged. With nothing left to push water out, the moment you open a tap the pressure drops to cut-in and the pump starts. Close the tap and pressure shoots back to cut-out in seconds. You will usually notice one or more of these:
- With a faucet open, you hear the pump kick in, cut out, and kick in again a few seconds apart.
- The gauge needle swings quickly between the low and high numbers.
- Lights dim or flicker in rhythm with the pump starting.
- Pressure pulses in the shower instead of holding steady.
- The tank sounds solid when you knock on it near the top, and it feels heavy and hard to rock.
Trades call that short cycling, and it wears on every part connected to the tank.
Why a short-cycling pump should not wait
Every start is the hardest moment in a pump motor's life. The motor pulls a heavy surge of current to get moving, and that surge turns into heat in the windings. A motor that starts now and then sheds the heat between runs. One that starts every few seconds never gets the chance.
The damage spreads from there. Pressure switch contacts arc on every start, so they burn and pit. On a three-wire submersible, the capacitor and relay in the control box take the same beating. Down in the well, the pump twists a little each time it kicks on, working at the drop pipe, the wire, and the splice.
The usual order of failure: the tank first, then the switch, then the control box or the pump itself. A failed tank can also rust through and leak into a crawlspace or basement for weeks before anyone looks. Catch it at the tank stage and one part changes instead of three.
Checking the air charge with a tire gauge
The air charge in a bladder or diaphragm tank should sit 2 psi below the switch's cut-in pressure: 28 psi on a 30/50 switch, 38 psi on a 40/60. You can check it without touching any wiring, as long as you go in this order.
- Find your cut-in. Run a tap and watch the gauge. Where the needle stops falling and starts to climb is cut-in.
- Turn the pump off at its breaker in the main panel.
- Open a tap and leave it open until the flow stops and the gauge reads zero. The charge only reads true on an empty tank.
- Unscrew the cap on the air valve at the top of the tank. It looks like the valve on a car tire.
- Check it with a tire gauge. Add air with a small compressor, or let some out, until it reads 2 psi below cut-in.
- Close the tap, replace the valve cap, and turn the breaker back on.
When water comes out of the air valve
Press the valve stem for a second. A hiss of air is good news. A spurt of water means the bladder or diaphragm has torn and water has reached the air side. More air will not fix that, and on most household tanks the bladder cannot be replaced, so the tank comes out.
Sizing a tank by drawdown instead of the label
The size printed on a tank describes the steel shell, not how much water it gives you. Drawdown is only a fraction of that, because the air charge takes up part of the space even when the tank is full.
Three things decide the right size. First, the pump's flow: a strong pump fills a small tank in moments and shuts off. Second, the switch setting. Higher settings deliver less drawdown from the same tank, so a 40/60 system often needs a bigger tank than a 20/40 system to give the pump the same run. Third, how the household uses water. A big family, a lawn sprinkler, or animals on the property all add up.
The aim is a tank that lets the pump run long enough to cool and settle before it stops. We size a replacement on those three points rather than matching whatever was there, since the original was not always right.
Tanks in well houses, crawlspaces, basements, and garages
Where the tank sits shapes the job. In Piedmont homes we find them in four places.
Well houses. Common on older properties, with the tank beside the wellhead. Watch for freeze damage on exposed pipe, rust at the base, and a door that no longer keeps out wind and animals.
Crawlspaces. Often the hardest spot to work. Headroom is low, the ground stays damp, and cold well water makes the tank sweat all summer, which rusts the bottom. A failed tank full of water is heavy, and it leaves through the same small hatch the new one comes in through.
Basements. The easiest access by far. A rust ring on the floor under the tank is an early warning.
Garages. Usually tucked in a corner near the panel. Keep an eye on an outside wall that gets cold in a hard freeze, and on a tank within reach of a bumper.
What happens when we come out to replace a tank
A pressure tank replacement is one of the more straightforward jobs on a well system. We still do it in a set order, because the steps people skip are the ones that cause the next call.
- We confirm the tank is really the problem. We check the air valve, watch a few cycles, and rule out the switch and the pump.
- We shut the pump off at the breaker and empty the system.
- We look over the tank tee, the short run of fittings that holds the gauge, switch, relief valve, and hose valve. Worn or rusted pieces get replaced while everything is apart.
- We take out the old tank and set the new one level on a solid base.
- We set the new tank's air charge before any water goes in, since the factory setting may not match your switch.
- We bring the pump back on, bleed the air out of the lines, and check every joint for leaks.
Tuning the whole system after the new tank is in
A new tank on a badly set system will not outlast the old one by much. Tuning is what makes a pressure tank replacement worth doing.
We check the switch against a test gauge to see where it really cuts in and out, then adjust it or replace it if the contacts are burned. Old gauges get swapped, since one that reads 5 psi off throws every other setting off too. Then we run water and watch a full cycle: a clean start, a healthy run, and a stop without chatter.
We also make sure the pump stays quiet with every tap closed. A yearly checkup is what the National Ground Water Association recommends, and its list covers the tank and switch along with the pump, the flow, and a water test. EPA guidance adds a water test as soon as you repair or replace any piece of the well system, and a new tank counts.
If your tank is clicking, sweating, or spitting water from the valve, call (336) 613-4314 and tell us what the gauge is doing.